Gamma Spectroscopy Lab Part 1: Background Notes & Theory
The following is an ongoing build diary for my gamma spectrometer lab, which is why some things are in past/future tense since portions were typed before/during/after setting up various equipment.
Here is the end result I wanted: a radioactive sample in a lead shield pig > measured by a Nai(TL) scintillation crystal detector > powered by the GS-1100A pmt driver > the signal is fed backwards through the GS-1100A to the computer running PRA or Theremino > which displays gamma energy lines on the screen.

The GS-1100A is powered by the desktop computer's USB port. The GS-1100A is what provides the high voltage to run the NaI(TL) detector. The GS-1100A is also what converts the NAi(TL) scintillator's output to sound, which is then fed back to the computer's mic/line input.
Scintillation Detectors (Not Geiger Counters)
Geiger counters give a click. Sometimes a lot of clicks, sometimes just a few. And that's all they do.Gamma Spectroscopy takes a click and analyzes that click, developing it into a waveform shape that can be analyzed so minutely that you can tell what element/radioisotope you're measuring. It does this by calculating the spectrum of the radioactive source.
Geiger Counter = "Lots of clicking!" vs Gamma Spectrometer = "You've got plutonium!"
Here's the basics of gamma spectrometry, stated in various ways but saying the same thing :
A gamma wave hits the scintillator crystal which glows a little. The Photo Multiplier Tube amplifies this glow and change it to voltages which are read by the Multi Channel Analyzer and output to a computer screen in the form of an x/y waveform graph.
Gamma Ray > Scintillator > Photo Multiplier Tube > Multi Channel Analyzer > Display.
Gamma Ray > Scintillator > PMT > MCA > Display.
Gamma Ray > photon > photo-electrons > electrons > voltage > display.
Gamma rays are waves of photon energy. A photon is a packet of light energy. A Gamma ray is a certain frequency of light energy/photon. Different wavelengths of energy are: visible light, UV light, x-rays, gamma rays, FM and AM radio, etc.
Gamma rays/photons have ZERO mass. They have no electrical charge (neutral). As such they move ONLY at the speed of light and never slow down. They can be scattered (bounced in a different direction losing none or some of its energy) or absorbed (it is destroyed and ALL its energy is transferred to whatever it hits and either knocks off an electron which is then called a photo-electron, or it splits into an electron + positron itself).
Thus, like the rest of the spectrums of light the question remains, "is it a wave or a particle?" At different times it behaves like both!
In our setup a gamma ray hits the scintillator crystal. The Scintillator crystal gives off light (photons). The photons enter the Photo Multiplier Tube. Inside the Photo Multiplier Tube there is a dynode. Each photon (sometimes they call this a "photo-electron") hits a metal plate (dynode) and turns into something like 10 impact electrons. There are many of these dynode plates, each one giving off more and more impact electrons as the energy travels through the PMT. At the other end of the PMT comes the electrons that are now around 1,000,000 times more numerous. NaI(Tl) gives off 42,000 photons per MeV; so 42 photons per KeV. The multi channel analyzer then sorts these voltages and sends the info to a display. The display can be a computer screen showing a wavelength in x/y axis. Each radioactive substance has a unique wavelength/shape and can thus be identified.
This is very cool so, of course I needed to set up a gamma spectroscopy lab in my house. First I'd need a radiation probe that has a scintillation crystal instead of a Geiger-Mueller (GM) Tube. GM tubes just give a click, no other usable information. Different crystals are better suited to reading different power ranges of gamma energy.
I snagged this chart of Gamma Energies from Cal State Polytech Professor Peter Siegel's Biology 431 Study Guide from the Physics Department at Cal Poly Pomona. This lists the gamma energy of various radioactive substances. Of note for me are AM-241, LU-176, the various U- uranium isotopes and the old stand by: Radium.
Note that it gives the energy, but not the wavelength since gamma waves are around 0.1nm anyway. We're talking about Kilo electron Volts (KeV) here. This is not like my other spectrometers that give nice, simple colored lines that are held up to a nano meter scale ("green means the element mercury"). What will have is, say radioactive potassium (K-40) that upon decaying it gives off a neutrino and a 1460 KeV gamma ray. That 1460 will show up on our graph and we'll know we have Potassium K-40.
Gamma Energy
(KeV) |
Nuclide
|
Half-Life
|
Percent Yield
per decay |
8
|
Er-169
|
9.4 days
|
0.3
|
22
|
Sm-151
|
87 years
|
4
|
24
|
Sn-199m
|
250 days
|
16
|
30
|
Ba-140
|
12.8 days
|
11
|
31
|
Mg-28
|
21 hours
|
96
|
35
|
I-125
|
60 days
|
7
|
35
|
Te-125m
|
58 days
|
7
|
37
|
Br-80m
|
4.38 hours
|
36
|
40
|
Rh-103m
|
57 minutes
|
0.4
|
40
|
I-129
|
1.7×10⁷ years
|
9
|
47
|
Pb-210
|
21 years
|
4
|
51
|
Rh-104m
|
4.41 minutes
|
47
|
53
|
Te-132
|
78 hours
|
17
|
58
|
Gd-159
|
18.0 hours
|
3
|
58
|
Dy-159
|
144 days
|
4
|
59
|
Te-127m
|
109 days
|
0.19
|
60
|
Am-241
|
458 years
|
36
|
63
|
Yb-169
|
32 days
|
45
|
63
|
Th-234
|
24.1 days
|
3.5
|
68
|
Ta-182
|
115 days
|
42
|
68
|
Ti-44
|
48 hours
|
90
|
70
|
Sm-153
|
47 hours
|
5.4
|
77
|
Pt-197
|
18 hours
|
20
|
77
|
Hg-197
|
65 hours
|
18
|
78
|
Ti-44
|
48 hours
|
98
|
80
|
Ba-133
|
10.51 years
|
36
|
81
|
Ho-166
|
26.9 hours
|
5.4
|
81
|
Xe-133
|
5.27 days
|
37
|
84
|
Tm-170
|
130 days
|
3.3
|
84
|
Th-228
|
1.90 years
|
1.6
|
87
|
Eu-155
|
1.81 years
|
32
|
88
|
Pd-109 / Ag-109m
|
13.47 hours / 40 seconds
|
5
|
Gamma Energy
(KeV) |
Nuclide
|
Half-Life
|
Percent Yield
per decay |
88
|
Cd-109 / Ag-109m
|
453 days / 40 seconds
|
5
|
88
|
Lu-176m
|
3.7 hours
|
10
|
91
|
Nd-147
|
11.1 days
|
28
|
93
|
Th-234
|
24.1 days
|
4
|
95
|
Dy-165
|
139.2 minutes
|
4
|
99
|
Gd-153
|
242 days
|
55
|
99
|
Au-195
|
183 days
|
10
|
100
|
Pa-234
|
6.75 hours
|
50
|
103
|
Sm-153
|
47 hours
|
28
|
104
|
Sm-155
|
23 minutes
|
73
|
105
|
Eu-155
|
1.81 years
|
20
|
113
|
Lu-177
|
6.7 days
|
2.8
|
122
|
Co-57
|
270 days
|
87
|
122
|
Eu-152
|
12 years
|
37
|
123
|
Eu-154
|
16 years
|
38
|
124
|
Ba-131
|
12 days
|
28
|
128
|
Cs-134m
|
2.9 hours
|
14
|
129
|
Os-191
|
15 days
|
25
|
133
|
Hf-181
|
42.5 days
|
48
|
134
|
Ce-144
|
284 days
|
11
|
136
|
Hg-197m
|
24 hours
|
42
|
137
|
Re-186
|
90 hours
|
9
|
140
|
Tc-99m
|
6 hours
|
90
|
143
|
U-235
|
7.1 x 10⁸ years
|
11
|
145
|
Ce-141
|
33 days
|
48
|
147
|
Ta-182m
|
16.5 minutes
|
40
|
150
|
Te-131
|
25 minutes
|
68
|
150
|
Cd-111m
|
48.6 minutes
|
30
|
150
|
Kr-85m
|
4.4 hours
|
74
|
Gamma Energy
(KeV) |
Nuclide
|
Half-Life
|
Percent Yield
per decay |
155
|
Re-188
|
16.7 hours
|
10
|
158
|
Au-199
|
75.6 hours
|
37
|
163
|
Ba-140
|
12.8 days
|
6
|
164
|
Xe-131m
|
11.8 days
|
2
|
166
|
Ba-139
|
82.9 minutes
|
23
|
172
|
Ta-182m
|
16.5 minutes
|
40
|
185
|
U-235
|
7.1 x 10⁸ years
|
54
|
186
|
Ra-226
|
1602 years
|
4
|
191
|
Mo-101
|
14.6 minutes
|
25
|
191
|
Pt-197
|
18 hours
|
6
|
192
|
In-114m
|
50.0 days
|
17
|
198
|
Yb-169
|
32 days
|
35
|
208
|
Lu-177
|
6.7 days
|
6.1
|
210
|
Ge-77
|
11.3 hours
|
61
|
215
|
Hf-180m
|
5.5 hours
|
82
|
215
|
Ru-97
|
2.9 days
|
91
|
230
|
Te-132
|
78 hours
|
90
|
233
|
Xe-133m
|
2.26 days
|
14
|
239
|
Pb-212
|
10.64 hours
|
47
|
239
|
As-77
|
38.7 hours
|
2.5
|
246
|
Sm-155
|
23 minutes
|
4
|
247
|
Cd-111m
|
48.6 minutes
|
94
|
250
|
Xe-135
|
9.2 hours
|
91
|
255
|
Sn-133
|
115 days
|
1.8
|
263
|
Ge-77
|
11.3 hours
|
45
|
265
|
Ge-75
|
82 minutes
|
11
|
265
|
Se-75
|
120.4 days
|
60
|
279
|
Hg-203
|
46.9 days
|
77
|
284
|
I-131
|
8.05 days
|
5.4
|
286
|
Pm-149
|
53.1 hours
|
2
|
293
|
Ce-143
|
33 hours
|
46
|
295
|
Pb-214
|
26.8 minutes
|
19
|
Gamma Energy
(KeV) |
Nuclide
|
Half-Life
|
Percent Yield
per decay |
299
|
Tb-160
|
72.1 days
|
30
|
305
|
Kr-85m
|
4.4 hours
|
13
|
307
|
Tc-101
|
14.0 minutes
|
91
|
308
|
Er-171
|
7.52 hours
|
63
|
310
|
Pa-233
|
27.0 days
|
44
|
317
|
Ir-192
|
74.2 days
|
81
|
319
|
Nd-147
|
11.1 days
|
3
|
320
|
Cr-51
|
27.8 days
|
9
|
325
|
Sn-125m
|
9.7 minutes
|
97
|
328
|
Ir-194
|
17.4 hours
|
10
|
333
|
Hf-180m
|
5.5 hours
|
93
|
335
|
Cd-115 / In-115m
|
53.5 hours / 4.5 hours
|
50
|
342
|
Ag-111
|
7.5 days
|
6
|
344
|
Eu-152
|
12 years
|
27
|
351
|
Bi-211
|
2.15 minutes
|
14
|
352
|
Pb-214
|
26.8 minutes
|
36
|
356
|
Ba-133
|
10.51 years
|
69
|
360
|
Se-83
|
25 minutes
|
69
|
362
|
Pd-103
|
17 days
|
0.06
|
363
|
Gd-159
|
18.0 hours
|
9
|
364
|
I-131
|
8.05 days
|
82
|
368
|
Ni-65
|
2.56 hours
|
4.5
|
388
|
Sr-87m
|
2.83 hours
|
80
|
393
|
Sn-113
|
115 days
|
64
|
393
|
In-133m
|
100 minutes
|
64
|
403
|
Kr-87
|
76 minutes
|
84
|
405
|
Pb-211
|
36.1 minutes
|
3.4
|
412
|
Au-198
|
2.698 days
|
95
|
427
|
Sb-125
|
2.7 years
|
31
|
439
|
Zn-69m
|
13.8 hours
|
95
|
Gamma Energy
(KeV) |
Nuclide
|
Half-Life
|
Percent Yield
per decay |
441
|
I-128
|
25.0 minutes
|
14
|
444
|
Hf-180m
|
5.5 hours
|
80
|
468
|
Ir-192
|
74.2 days
|
49
|
477
|
Be-7
|
53 days
|
10.3
|
479
|
W-187
|
23.9 hours
|
23
|
482
|
Hf-181
|
42.5 hours
|
81
|
487
|
La-140
|
40.22 hours
|
40
|
490
|
Cd-115
|
53.5 hours
|
10
|
496
|
Ba-131
|
12 days
|
48
|
497
|
Ru-103
|
39.6 days
|
88
|
511
|
Cu-64
|
12.8 hours
|
38
|
511
|
Ga-68
|
68.3 minutes
|
176
|
511
|
As-74
|
17.9 days
|
59
|
511.0034
|
Na-22
|
2.60 years
|
180
|
512
|
Ru-106 / Rh-106
|
367 days / 30 seconds
|
21
|
514
|
Sr-85
|
64 days
|
100
|
514
|
Kr-85
|
10.76 years
|
0.41
|
520
|
Se083
|
25 minutes
|
59
|
527
|
Xe-135m
|
15.6 minutes
|
80
|
530
|
I-133
|
21 hours
|
90
|
530
|
Cd-115
|
53.5 hours
|
26
|
533
|
Nd-147
|
11.1 days
|
13
|
537
|
Ba-140
|
12.8 days
|
34
|
538
|
I-130
|
12.4 hours
|
99
|
554
|
Br-82
|
35.34 hours
|
66
|
559
|
As-76
|
26.5 hours
|
43
|
564
|
Sb-122
|
67 hours
|
66
|
570
|
Bi-207
|
30 years
|
98
|
583
|
Tl-208
|
3.10 minutes
|
86
|
Gamma Energy
(KeV) |
Nuclide
|
Half-Life
|
Percent Yield
per decay |
596
|
As-74
|
17.9 days
|
61
|
599
|
Sb-125
|
2.7 years
|
24
|
603
|
Sb-125
|
60 days
|
97
|
605
|
Cs-134
|
2.05 years
|
98
|
609
|
Bi-214
|
19.7 minutes
|
47
|
619
|
Br-82
|
35.34 hours
|
41
|
622
|
Ru-106 / Rh-106
|
367 days / 30 seconds
|
11
|
637
|
I-131
|
8.05 days
|
6.8
|
658
|
Ag-110m
|
253 days
|
96
|
658
|
Ag-110
|
24.4 seconds
|
4.5
|
661.64
|
Cs-137 / Ba-137m
|
30 years / 2.55 minutes
|
85
|
669
|
I-130
|
12.4 hours
|
100
|
670
|
I-132
|
2.3 hours
|
144
|
686
|
W-187
|
23.9 hours
|
27
|
695
|
Pr-144
|
17.3 minutes
|
1.5
|
697
|
Te-129m
|
34 days
|
6
|
724
|
Zr-95
|
65 days
|
49
|
726
|
Ru-105
|
4.44 hours
|
48
|
727
|
Bi-212
|
60.6 minutes
|
7
|
740
|
Mo-99
|
67 hours
|
12
|
743
|
I-130
|
12.4 hours
|
87
|
747
|
Zr-97 / Nb-97m
|
17.0 hours / 60 seconds
|
92
|
748
|
Sr-91
|
9.67 hours
|
27
|
756
|
Zr-95
|
65 days
|
49
|
765
|
Nb-95
|
35 days
|
100
|
773
|
I-132
|
2.3 hours
|
89
|
Gamma Energy
(KeV) |
Nuclide
|
Half-Life
|
Percent Yield
per decay |
777
|
Br-82
|
35.34 hours
|
83
|
780
|
Te-131m
|
30 hours
|
60
|
796
|
Cs-134
|
2.05 years
|
99
|
810
|
Co-58
|
71.3 days
|
99
|
832
|
Pb-211
|
36.1 minutes
|
3.4
|
835
|
Ga-72
|
14.10 hours
|
96
|
834.827
|
Mn-54
|
303 days
|
100
|
837
|
Mn-56
|
2.58 hours
|
99
|
850
|
Te-131m
|
30 hours
|
31
|
879
|
Tb-160
|
72.1 days
|
31
|
885
|
Ag-110m
|
253 days
|
71
|
889
|
Sc-46
|
83.9 days
|
100
|
898
|
Rb-88
|
17.8 minutes
|
13
|
900
|
Pa-234
|
6.75 hours
|
70
|
935
|
Cd-115m
|
43 days
|
1.9
|
966
|
Tb-160
|
72.1 days
|
31
|
1020
|
Mo-101
|
14.6 minutes
|
25
|
1025
|
Sr-91
|
9.67 hours
|
30
|
1063
|
Bi-207
|
30 years
|
77
|
1078
|
Ba-68
|
68.3 minutes
|
3.5
|
1095
|
Fe-59
|
45 days
|
56
|
1115
|
Zn-65
|
245 days
|
49
|
1115
|
Ni-65
|
2.56 hours
|
16
|
1120
|
Sc-46
|
83.9 days
|
100
|
1120
|
Bi-214
|
19.7 minutes
|
17
|
1122
|
Ta-182
|
115 days
|
34
|
1140
|
I-135
|
6.7 hours
|
37
|
1173.2
|
Co-60
|
5.26 years
|
100
|
1210
|
Y-91
|
58.8 days
|
0.3
|
1274.5
|
Na-22
|
2.60 years
|
100
|
Gamma Energy
(KeV) |
Nuclide
|
Half-Life
|
Percent Yield
per decay |
1278
|
Eu-154
|
16 years
|
37
|
1280
|
I-135
|
6.7 hours
|
34
|
1292
|
Fe-59
|
45 days
|
44
|
1293
|
In-116m
|
54.0 minutes
|
80
|
1293
|
Ar-41
|
1.83 hours
|
99
|
1308
|
Ca-47
|
4.53 days
|
74
|
1332.5
|
Co-60
|
5.26 years
|
100
|
1350
|
Mg-28
|
21 hours
|
70
|
1369
|
Na-24
|
15.0 hours
|
100
|
1380
|
Ho-166
|
26.9 minutes
|
0.9
|
1408
|
Eu-152
|
12 years
|
22
|
1426
|
Cs-138
|
32.2 minutes
|
73
|
1434
|
V-52
|
3.76 minutes
|
100
|
1460
|
K-40
|
1.29 x 10⁹ years
|
11
|
1481
|
Ni-65
|
2.56 hours
|
25
|
1524
|
K-42
|
12.4 hours
|
18
|
1570
|
Pr-142
|
19.2 hours
|
3.7
|
1596
|
La-140
|
40.22 hours
|
96
|
1600
|
Cl-38
|
37.3 minutes
|
38
|
1692
|
Sb-124
|
60 days
|
50
|
1764
|
Bi-214
|
19.7 minutes
|
17
|
1780
|
Al-28
|
2.31 minutes
|
100
|
1811
|
Mn-56
|
2.58 hours
|
29
|
2614
|
Tl-208
|
3.10 minutes
|
100
|
2754
|
Na-24
|
15.0 hours
|
100
|
6130
|
N-16
|
7.2 seconds
|
69
|
7110
|
N-16
|
7.2 seconds
|
5
|
By the way, another great place to creep around and find info like this is the Oak Ridge National Lab at http://web.ornl.gov/info/reports/ which has tons of DECLASSIFIED reports of various techniques for radioactive fun. The earlier reports (1940s) are much more useful--later reports deal with specific institutional issues at the lab.

The Oak Ridge directories are by year--so just poke around. A cool file I found was "The Preparation, Properties, and Uses of Americium - 241, Alpha-, Gamma-, and Neutron Sources" in the 1962 folder. It was in one these reports that I found the idea of using talc all over the inside of a detector to increase internal reflectance...but was abandoned in favor of wrapping the sides of the crystal with aluminum foil instead, 'cause you know: who the heck wants a bunch of talc all over the insides of their particle physics equipment right? Especially since they were blowing air into the detectors to keep a positive atmospheric pressure in them so they could use them under water...'cause then the talc would just blow out into the water right? And that would be a really odd mess right? Then again I almost blasted a metal rod through my eyeball during a mishap with some acetylene so who am I to judge.
Anyway, you can actually order radioisotopes and have them delivered straight from the source in Oak Ridge, Tennessee. From the "Home of the Atomic Bomb" came my Cesium-137 sample.


I already have a probe (a Ludlum 44-7) that can read at the 60 KeV to 100 KeV range, but it's a Geiger-Mueller (GM) tube and not a scintillation crystal. Also, that's spread out over the alpha, beta and gamma ranges. I do have a probe with a scintillation crystal though, but it's a Ludlum 42-2 set up for neutron detection. Also, apparently my own blog here is one of the few resources in the that probe's specifications. I have no idea how it would react to gamma wave-other than screaming wildly like it does around Uranium. Although, I turned it down (up?) to 600v and it's actually a really nice gamma detector at that range.
Another option are lutetium-yttrium orthosilicate (LYSO) scintillators. What's neat about them is that they are in themselves radioactive! This is called in the literature "internal scintillator radioactivity". The lutetium (LU-176) has a half life of over 3 billion years. As a check source for calibration it's a fantastically stable thing to have. The small LYSO crystals go for around $10 online, although a bigger crystal for use as an actual scintillation detector can go for $200. LYSO crystals are very robust and can take being handled by human hands in humid air. They are also very dense and good at stopping particles. I already have one as a sample radioactive source. My geiger probes won't pick up it's weak radiation-so it's no go for Geiger detectors; only for gamma spectrometry.
Another crystal scintillation type is NaI(TL); which is Sodium Iodide crystals doped with a little bit of deadly Thallium. This type of crystal, although fragile, has the highest light output. It is the crystal by which other scintillators are judged by in that respect. Remember, we're going for flashes of light as particles hit the crystal, and then measuring the frequency of that light.
Scintillation crystals react differently to different wavelengths of light and their power. Luckily, once a scintillator is mated to a Multi Channel Analyzer (MCA) the hardware and software do all the work and a lovely x/y line pops up telling you what you have.

Above is the scintillator I ended up with at first and while it's fantastic for survey meter work I replaced it for gamma Spectrometry while dialing in my new system.
Here's info about it anyway: It's made by an American company confusingly named "Alpha Spectra Inc", but its for gamma. Identical units are also found labeled as Bicron Inc. The unit as a whole is an Alpha Spectra Inc. 5I5 X 12/1.12 5B Scintillation Detector. There is an "I" not a "1" in the name on the label and the meager online info, but you could also try 515x12/1.12 as well. It's 9.5" Long and 1.4" square and has a 3" long x 1" square St. Gobain NaI(TL) crystal.
It has an Adit-brand B29B01W Photo Multiplier Tube (PMT) with an 11 stage dynode. The "1.12" in the name apparently refers to the 1 1/8" diameter of the PMT. I've read where the 5I5 x 12 part of the name refers to 0.25" or 1.25" square crystal or something, but I don't see how that relates to the case or the crystal. I guess 0.515mm = 0.2" and 0.2" x 12 = 0.24". I dunno...but it was made in Texas. It's actually a version of their B29B02H that's just shorter, which is weird because the unit as a whole is super heavy and quite large already! It also features a delicious soda-lime glass window for the photons to enter.

It should be noted that D11 goes to Pin 12 (not pin 11). Anode = pin 13 and Cathode = pin 14. The 4700 cap is orange and huge and obvious, and ties D11 to ground. I believe the 5M resistor at the bottom is actually the potentiometer knob which can vary the total resistance of this unit from 11.4M to 16.4M Ohms. People who've actually managed to use this detector successfully for gamma spectrometry work actually turn it down to 11M ohms.
The GS-1100A PMT driver has it's lowest voltage at 600v. See below for those calculations.

The Alpha Spectra Inc. detector has a sodium iodide crystal doped with Thallium NaI(TL) that shoots off photons when hit with gamma rays (which are also photons). Then a voltage multiplier dynode scales up the photons by x 1 million and turns them into electrons, then voltage which gives the readout.
The spec sheet on the PMT seems to imply that it's happiest at 700v, but at onl 500 volts it can "see through" my galvanized steel containment vessel to find the pitchblende (uranium) inside. Which is why preparations for the casting of a 223lbs lead "pig" vessel are under way.
INFORMATION FOR GAMMA SPECTROMETRY
For gamma ray spectroscopy NaI(TL) crystal scintillation detectors are best. Bicron, Rexon, Teledyne and a few other detector brands can share internal components with each other. Here are general crystal stats:
Also I discovered that my Rexon 3.0 PX 2.0/3.0 is also known as an Alpha Spectra 128i/3 and as a Bechtel 223-128. It has a super fancy voltage divider with three tiers of round circuit boards-which unplugged and replaced with the one from Iradinc.


The bottom layer is high voltage. The other two are controls for computer interface.


Luckily, it just unplugged easily and I popped on my new 62M Ohm voltage divider and then it worked with the Ludlum Model 3 survey meter and the GS-1100A.

The Alpha Spectra Inc. has a variable resistance pot right on top that can vary the resistance from 11.4M-16.4M (according to spec sheet) so I should be fine but again, we'll see. I had to turn this pot all the way down and then turn the voltage on my Ludlum 3 survey meter down 495 v to get the background reading to just a few counts and make it usable as a simple gamma probe. Of course this may not matter in gamma spectrometry and maybe being in my custom cast lead enclosure should help a bit. Maybe I can also simply swap-out the potentiometer with one of a different resistance?
Looking at the face value of the resistors it's actually 11.181M + the 5M potentiometer. So, 16.181M working with at most 500v.
The GS-1100A has a known voltage dip which may help me out too. It has a 1M resistor built into it, which is used in the following calculations as "+ 1M".
Do you want to learn more about photo multiplier tubes? Noted manufacturer Hamamatsu has this free book available as a 323 page PDF file online: https://www.hamamatsu.com/resources/pdf/etd/PMT_handbook_v3aE.pdf
Adit themselves are now part of ET Enterprises: http://www.et-enterprises.com/ and you can search this tube and get spec sheets and even accessory part numbers.
Next steps will be making the lead shielding "pig" and setting up the hardware.

So a lead shield was needed. The design started simple and lead is cheap.
I requested a large lead shield since I could then also use it for cosmic ray and muon detection where you want the least amount of background noise as possible.
So, a mold was made to pour the lead into.

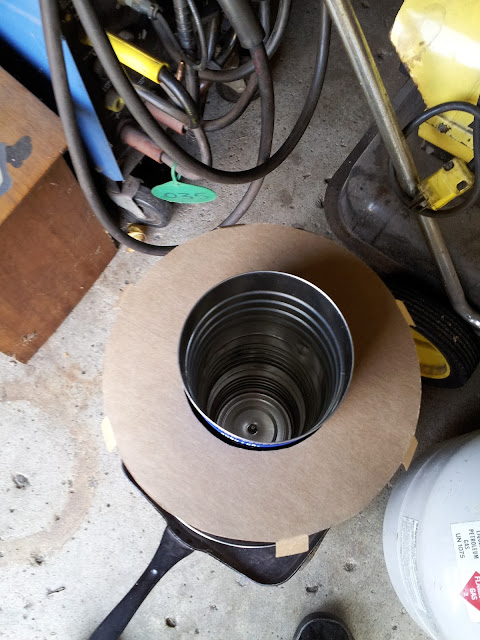
On top of that is bolted a column of small 4" diameter Turkish coffee cans (the "pipe" in the diagram above). These will be empty and provide the open center of the lead pipe we're making. Of course, to have one end of the pipe sealed permanently we'll pour 2" of lead into this center column-the rest of the lead gets poured outside of this column.
The surrounding the central column is a metal sheet pounded into a perfectly straight cylinder that is 8" in diameter.


The rest of the lead gets poured outside of the central column and inside of the outer column. This yields a lead pipe with: a 4" diameter center opening inside diameter; an 8" exterior diameter and 2" thick walls. With 2" of lead closing off one end of the pipe permanently.
Here is the start of the 8" outer cylinder mold being formed. It started as a rectangle sheet of steel. Each of the two ends were bent to form a simple interlocking joint (a flatlock seam) once the sheet was formed into a cylinder. The bends were made with a tool called a seamer but pliers could have been used.
A weight lifting weight was placed inside the cylinder and a hammer used to crimp each end of the cylinder to act as a sort of mandrel to pound against. The weight was used at both ends of the cylinder to true up and round the ends-then this weight was removed. This provided a few things: the rounded edges look really nice; the rounded (somewhat chamfered / bull nosed / beveled) edge will provide a rounded edge to the lead instead of crumbly sharp edge; by pounding the edges of the cylinder over the opening at each end became a nearly perfect circle; this rounded edge is much stronger and keeps the cylinder from flexing; these edges are perpendicular to the cylinder walls which makes the cylinder stand perfectly upright on a table--which means it'll stand upright on the pot lid which will hold these molds while the molten lead is poured.
Here's the cylinder at the beginning of the process: it's locked together with the flatlock seam, but it's more of a teardrop shaped tube instead of a circular tube. The ends are locked together (loosely) at that seam. The seam is later pounded flat.


The iridescent rainbow color is from tin contamination. Tin floats on top of the silvery molten lead and looks like bright blue plastic.

After the first 2" the center column gets filled with sand to keep the lead out. Here you can see the area beyond the outer rim filled with white sand to keep the lead from spreading past the (black) outer casing of the pig.
Our Lead Casting Process:
1. Put lead wheel weights into crucible.
2. Heat from above and add more lead.
3. Heat from below while someone else picks out the steel clips with a strainer ladle (big spoon with holes in it).
3. Take away the torch once all the solid junk has been removed.
4. Dip a large wax candle into the molten lead and quickly remove it: it will smoke and then burst into flames.
5. Strain any remaining slag the wax brought to the surface.
6. Pour the lead into the mold.
Supplies Needed:
Set all this stuff up before starting!!!!! Do a "walk-through" of how to position the torch, how to transition from heating top to bottom without hitting the knobs on the torch, who will ladle the slag and how you'll not burn their hands while they do it.
Casting the Pig! It was finished on Thanksgiving 2016 so it's the Lead Turkey!
Here are the 10-15lbs of clips and slag removed from the first 100lbs of wheel weights' worth of lead. This was once an over-full 5 gallon bucket of wheel weights.
If you buy lead ingots you just get lead. If you buy wheel weights you get 10-35lbs of clips and other junk that gets strained out with the ladle. Remember that when pricing out lead sources!

This is the halfway point. About 100-120lbs of lead have been melted and poured into the mold. Look at those two trays filled with steel clips and slag! That's why you need two people: one just operates the torch--the other strains the clips and slag and then carefully pours the molten lead into the mold.
Blueprints showing the half-way filled status:


The lead turkey on its very own torpedo sled! ( and I know a little something about torpedoes: http://mikelogusz.blogspot.com/ )


Under the LEVELS TAB > set volume to 100%
Under the ENHANCEMENTS TAB > CHECK to disable all sound effects
Under the ADVANCED TAB > note your bits (16) and Megahertz (44,000 or 48,000 or 96,000)
In either PRA or Theremino you'll tell it that you're using your soundcard, that it's set to 16 bits and 96,000Mhz or whatever. You'll also have to specify you're using the LEFT channel in and out!
Here are some recommended basic settings for PRA but you'll still have to play with the single input wave audio display with the x/y grid which is super-critical and a total pain:

These settings will change depending on your: scintillator detector; voltage setting on the PMT driver; type of sound card; volume setting of sound card; radioactive source; background radiation; type of experiment you're performing; etc. The above is the recommended starting points.
In some versions of the software, depending on your detector you may have negative pulses. You'll just type in "-0.3" instead of "0.3" in the top left Height Threshold windows.
I played with different Height Threshold settings from 0.01 to 1 and everything still "worked" but the readings were different. So, basically as long as you have the input = Left and output = Left and Channel Selection = LEFT in the PRA or Theremino software and the volume set to 100% on your control panel > soundcard you'll almost always get some sort of reaction by moving radioactive material up to the detector.
After that, it's just calibration to fine tune your settings. For me, getting a response on screen was easy. I'm still playing around with the calibration.
So, to simplify calibration I purchased a CS-137 check source.
Cs-137 beta decays into Ba-137m (metastable). The Ba-137m gamma decays (at 661.64Kev) into stable Ba-137. This gives us the right hand spike on screen. In the center may be a little spike at 551Kev because
Hopefully, once everything is setup properly the screen will show a large spike at 661.64KeV (which is really from the Ba-137m decaying into stable Ba-137) and another Barium spike closer to 32KeV. This is much simpler to deal with at first: two spikes on your computer screen.
As an aside, you can drizzle NaCl onto Cs-137 and elute the radioactive Ba-137m into a liquid solution that is radioactive! This is how those radioisotope generators with the little syringe plungers at school work. Wait an hour and more Cs-137 will decay into Ba-137m, and you can re-wash it with the acid to get even more radioisotopes out.
In these software programs when you do a background calibration there are two different ways: start taking data to teach the program what the individual scintillations look like (with the radioactive sample placed at the detector) or left clicking the computer mouse while using BGO on/off (with NO radioactive sample anywhere near the detector).
One teaches the program what the target isotope radiation (which you are measuring) looks like, the other teaches it what the background cosmic radiation (to be ignored) looks like. If you confuse the two you'll never get your setup calibrated correctly.
An important part in Theremino is "tuning" the waveform in the "Pulse Shape Visualizer" window! Not much is made of it in the manual, but in online tutorial videos it appears to be the key to getting anywhere.
Another thing is time! I would get a spike where I should but everything seemed messy and not really convincing. Then I decided to let it run for a few hours and bingo: much more professional results in PRA. In Theremino I got very similar (and perhaps a tad better) results in minutes--but only after weeks of fiddling with various detectors and finally replacing the old 5M Ohm voltage divider ((below) end caps with a 62M Ohm one from Irad Inc. This gave the added benefit that my new Bicron detector would also would now with my Ludlum 3 survey meter. The Alpha Spectra Inc. worked with the Ludlum 3 already because it has a variable Ohm load up to 16M.

Here is the new 62M Ohm voltage divider. It has a BNC connector. The old one had an MHV (mini high voltage) connector that worked with BNC cables once you trim the protruding white insulation off the MHV connector. Coincidentally, this is why SHV (safe high voltage) connectors were invented: you can't accidentally or on purpose force them to work with lower voltage BNC connectors.


P.S. Here's the internet's only photo (as of 3/7/2018) of a "Keplertron" which is a low-energy beta Spectrometer:

Don't worry-this was suitably declassified before posting ;)
Mike
Another option are lutetium-yttrium orthosilicate (LYSO) scintillators. What's neat about them is that they are in themselves radioactive! This is called in the literature "internal scintillator radioactivity". The lutetium (LU-176) has a half life of over 3 billion years. As a check source for calibration it's a fantastically stable thing to have. The small LYSO crystals go for around $10 online, although a bigger crystal for use as an actual scintillation detector can go for $200. LYSO crystals are very robust and can take being handled by human hands in humid air. They are also very dense and good at stopping particles. I already have one as a sample radioactive source. My geiger probes won't pick up it's weak radiation-so it's no go for Geiger detectors; only for gamma spectrometry.
Another crystal scintillation type is NaI(TL); which is Sodium Iodide crystals doped with a little bit of deadly Thallium. This type of crystal, although fragile, has the highest light output. It is the crystal by which other scintillators are judged by in that respect. Remember, we're going for flashes of light as particles hit the crystal, and then measuring the frequency of that light.
Scintillation crystals react differently to different wavelengths of light and their power. Luckily, once a scintillator is mated to a Multi Channel Analyzer (MCA) the hardware and software do all the work and a lovely x/y line pops up telling you what you have.

Above is the scintillator I ended up with at first and while it's fantastic for survey meter work I replaced it for gamma Spectrometry while dialing in my new system.
Here's info about it anyway: It's made by an American company confusingly named "Alpha Spectra Inc", but its for gamma. Identical units are also found labeled as Bicron Inc. The unit as a whole is an Alpha Spectra Inc. 5I5 X 12/1.12 5B Scintillation Detector. There is an "I" not a "1" in the name on the label and the meager online info, but you could also try 515x12/1.12 as well. It's 9.5" Long and 1.4" square and has a 3" long x 1" square St. Gobain NaI(TL) crystal.
It has an Adit-brand B29B01W Photo Multiplier Tube (PMT) with an 11 stage dynode. The "1.12" in the name apparently refers to the 1 1/8" diameter of the PMT. I've read where the 5I5 x 12 part of the name refers to 0.25" or 1.25" square crystal or something, but I don't see how that relates to the case or the crystal. I guess 0.515mm = 0.2" and 0.2" x 12 = 0.24". I dunno...but it was made in Texas. It's actually a version of their B29B02H that's just shorter, which is weird because the unit as a whole is super heavy and quite large already! It also features a delicious soda-lime glass window for the photons to enter.

It should be noted that D11 goes to Pin 12 (not pin 11). Anode = pin 13 and Cathode = pin 14. The 4700 cap is orange and huge and obvious, and ties D11 to ground. I believe the 5M resistor at the bottom is actually the potentiometer knob which can vary the total resistance of this unit from 11.4M to 16.4M Ohms. People who've actually managed to use this detector successfully for gamma spectrometry work actually turn it down to 11M ohms.
The GS-1100A PMT driver has it's lowest voltage at 600v. See below for those calculations.

The Alpha Spectra Inc. detector has a sodium iodide crystal doped with Thallium NaI(TL) that shoots off photons when hit with gamma rays (which are also photons). Then a voltage multiplier dynode scales up the photons by x 1 million and turns them into electrons, then voltage which gives the readout.
The spec sheet on the PMT seems to imply that it's happiest at 700v, but at onl 500 volts it can "see through" my galvanized steel containment vessel to find the pitchblende (uranium) inside. Which is why preparations for the casting of a 223lbs lead "pig" vessel are under way.
INFORMATION FOR GAMMA SPECTROMETRY
For gamma ray spectroscopy NaI(TL) crystal scintillation detectors are best. Bicron, Rexon, Teledyne and a few other detector brands can share internal components with each other. Here are general crystal stats:
Type
|
Scintillation Crystal Type
|
Density (g/cm)
|
Emission Maximum (nm)
|
Decay Constant
|
Index of refraction
|
Relative conversion efficiency
| |
BaF2
|
Barium Fluoride
|
4.88
|
310
|
0.63
|
us
|
1.50
| |
BGO
|
Bismuth Germanate
|
7.13
|
480
|
0.3
|
us
|
2.15
|
15-20
|
CaF2 (Eu)
|
Calcium Fluoride
|
3.18
|
435
|
0.94
|
us
|
1.47
|
50
|
CdWO4
|
Cadmium Tungstate
|
7.90
|
470/540
|
20/5
|
us
|
2.30
|
25-30
|
CsI(Na)
|
Cesium Iodide doped with Sodium
|
4.51
|
420
|
0.63
|
us
|
1.84
|
85
|
CsI(Tl)
|
Cesium Iodide doped with Thallium
|
4.51
|
550
|
1.0
|
us
|
1.79
|
45
|
CsF
|
Cesium Fluoride
|
4.64
|
390
|
3.5
|
ns
|
1.48
|
5-7
|
GSO(Ce)
|
Gadolinium Silicate doped with Cerium
|
6.71
|
440
|
30-60
|
ns
|
1.85
|
20-25
|
LiI (Eu)
|
Lithium Iodide
|
4.08
|
470
|
1.4
|
us
|
1.96
|
35
|
NaI (T1)
|
*Sodium Iodide doped with Thallium*
|
3.67
|
415
|
0.23
|
us
|
1.85
|
*100*
|
YAP
|
Yttrium Aluminum Oxide Perovskite
|
350
|
27
|
ns
| |||
ZnS(Ag)
|
Silver activated Zinc Sulfide
|
4.09
|
450
|
110
|
ns
|
2.36
|
25 - 30
|
Rexon Inc.'s Dr M. H. Farukhi has layed out an informative explanation of each crystal type here: http://www.rexon.com/crystalscintypes.htm
Many different detectors are made by the same few companies. A $600 Bicron unit can be identical to a $40 used Rexon!

Many different detectors are made by the same few companies. A $600 Bicron unit can be identical to a $40 used Rexon!
Also I discovered that my Rexon 3.0 PX 2.0/3.0 is also known as an Alpha Spectra 128i/3 and as a Bechtel 223-128. It has a super fancy voltage divider with three tiers of round circuit boards-which unplugged and replaced with the one from Iradinc.


The bottom layer is high voltage. The other two are controls for computer interface.


Luckily, it just unplugged easily and I popped on my new 62M Ohm voltage divider and then it worked with the Ludlum Model 3 survey meter and the GS-1100A.

GS-1100A PMT DRIVER
The PMT (photo multiplier tube) driver from Australia can apply voltages from 600v-1100v so I may have to short the first zener diode to ground (inside the GS-1100A driver from Australia, not my PMT). That will drop the voltage down -200v from the minimum 600v; so I'll be at 400v. We'll see. The PMT driver also plays best with detectors that have a resistance of 15M Ohm.The Alpha Spectra Inc. has a variable resistance pot right on top that can vary the resistance from 11.4M-16.4M (according to spec sheet) so I should be fine but again, we'll see. I had to turn this pot all the way down and then turn the voltage on my Ludlum 3 survey meter down 495 v to get the background reading to just a few counts and make it usable as a simple gamma probe. Of course this may not matter in gamma spectrometry and maybe being in my custom cast lead enclosure should help a bit. Maybe I can also simply swap-out the potentiometer with one of a different resistance?
Looking at the face value of the resistors it's actually 11.181M + the 5M potentiometer. So, 16.181M working with at most 500v.
The GS-1100A has a known voltage dip which may help me out too. It has a 1M resistor built into it, which is used in the following calculations as "+ 1M".
Voltage Setting on the knob = (desired voltage/Actual Resistance) x (Actual Resistance + 1M)
400v / 16.181 x (16.181+1) = 424v on the knob
400v / 16.181 x (16.181+1) = 424v on the knob
The lowest knob setting is 600 volts (which is actually 400 volts if I opened the unit up and grounded the 1st Zener Diode). That lowest setting of 400 volts would be less than 400 volts as you can see from the maths above with my particular detector plugged in the actual power reaching the PMT is only 94.11%.
So at the lowest setting of 600 volts > ground shorted to 400 volts = 376.44 Volts actual!
Not bad. I can always turn the voltage up, and this is before the lead shielding and shutting off the fluorescent lights dangling 2 feet above my testing table to get the background noise as low as possible.
Of course my neutron probe with a ZnS(Ag) crystal might work too --and it can take 600v no problem. So I've got plenty of options to try if just plugging in the Alpha Spectra Inc. detector at 600v is too noisy.
A "noisy" background with a lot of clicks on a survey meter might mean nothing on a spectrometry setup; and even though there were lots of clicks, I could still use the 10x, 100x meter settings and the needle was at the 1/4 to 1/2 point (with no radioactive sample) and rose noticeably when a radioactive sample was brought close to it: so plenty of headroom! Luckily the Ludlum 3 survey meter has an audio off switch, so the constant background clicks couldn't bother me.
Also, I noticed that the meter started rising when the sample was more than 2' away! None of my other detectors do that, so we've also got plenty of sensitivity! The fact that I was holding it in my hand was none too pleasant a thought.
I shouldn't be surprised, in a November 1950 Status and Progress Report from the Oak Ridge National Lab:
I guess I need to move to a spot farther away from my isotope collection!A "noisy" background with a lot of clicks on a survey meter might mean nothing on a spectrometry setup; and even though there were lots of clicks, I could still use the 10x, 100x meter settings and the needle was at the 1/4 to 1/2 point (with no radioactive sample) and rose noticeably when a radioactive sample was brought close to it: so plenty of headroom! Luckily the Ludlum 3 survey meter has an audio off switch, so the constant background clicks couldn't bother me.
Also, I noticed that the meter started rising when the sample was more than 2' away! None of my other detectors do that, so we've also got plenty of sensitivity! The fact that I was holding it in my hand was none too pleasant a thought.
I shouldn't be surprised, in a November 1950 Status and Progress Report from the Oak Ridge National Lab:
With a thallium activated NaI crystal, the lower energy detection limit is of the order of 10-15 Kv. The instrument has been used successfully in finding 25 gms. of U 235 deliberately hidden in a location where the background is of the order of 5000 counts per minute. The 25 gram source was easily detectable from one foot away even through 1/2 inch of steel; without shielding it read 30% over background at 10 feet.
Scintillator detectors (as opposed to Geiger-Mueller tubes) are also notoriously sensitive to electromagnetic field (EMF) interference from lights and other devices. The lead (and possibly a sheet of copper or mu-metal) will help with that too!
My next tests were: using a proper 10M ohm input sensitivity voltmeter instead of an 11M one; putting the Alpha Spectra Inc. scintillator in a light-proof bag to test for light leaks; turn off the lights to test for interference from the fluorescent lighting in my lab.
Test results: no light leak; no significant EMF interference. multimeter with 10M Ohm input resistance reads about 500v (instead of 250v).
The Alpha Spectra Inc. detector seems to operate just fine with the GS-1100A unit using PRA and/or Theremino MCA. I've have it at 600v-1000v and am still trying to find the sweet spot. At the lower voltages I have to raise the input gain in PRA to 3 or 4. I can have gain set to 1 with the voltages higher. It'll take weeks of experimenting to determine which settings have the best singal to noise ratio; however they all seem to work fine.
Adit themselves are now part of ET Enterprises: http://www.et-enterprises.com/ and you can search this tube and get spec sheets and even accessory part numbers.
Next steps will be making the lead shielding "pig" and setting up the hardware.
Gamma Spectrometry Lab 2: The Lead Shield

THE LEAD PIG
The lead was delivered yesterday and actual fancy blueprints drawn up. Soon a piece of equipment (the GS-1100A) will arrive from Australia: instead of clicks I'll have a computer screen saying "Uranium detected". Background radiation is an issue because instead of just a few extra spikes we'll get too many spectrum lines--this isn't a real problem since both PRA and Theremino allow you to take a reading of the background and then delete it before you place your radioactive sample onto the detector.So a lead shield was needed. The design started simple and lead is cheap.
I requested a large lead shield since I could then also use it for cosmic ray and muon detection where you want the least amount of background noise as possible.
So, a mold was made to pour the lead into.

At the bottom is a flat lid of a large "bowl".
On top of that is bolted a column of small 4" diameter Turkish coffee cans (the "pipe" in the diagram above). These will be empty and provide the open center of the lead pipe we're making. Of course, to have one end of the pipe sealed permanently we'll pour 2" of lead into this center column-the rest of the lead gets poured outside of this column.

The surrounding the central column is a metal sheet pounded into a perfectly straight cylinder that is 8" in diameter.


The rest of the lead gets poured outside of the central column and inside of the outer column. This yields a lead pipe with: a 4" diameter center opening inside diameter; an 8" exterior diameter and 2" thick walls. With 2" of lead closing off one end of the pipe permanently.
Here is the start of the 8" outer cylinder mold being formed. It started as a rectangle sheet of steel. Each of the two ends were bent to form a simple interlocking joint (a flatlock seam) once the sheet was formed into a cylinder. The bends were made with a tool called a seamer but pliers could have been used.
A weight lifting weight was placed inside the cylinder and a hammer used to crimp each end of the cylinder to act as a sort of mandrel to pound against. The weight was used at both ends of the cylinder to true up and round the ends-then this weight was removed. This provided a few things: the rounded edges look really nice; the rounded (somewhat chamfered / bull nosed / beveled) edge will provide a rounded edge to the lead instead of crumbly sharp edge; by pounding the edges of the cylinder over the opening at each end became a nearly perfect circle; this rounded edge is much stronger and keeps the cylinder from flexing; these edges are perpendicular to the cylinder walls which makes the cylinder stand perfectly upright on a table--which means it'll stand upright on the pot lid which will hold these molds while the molten lead is poured.
Here's the cylinder at the beginning of the process: it's locked together with the flatlock seam, but it's more of a teardrop shaped tube instead of a circular tube. The ends are locked together (loosely) at that seam. The seam is later pounded flat.

Patio blocks and steel bedframe rails.

Acetylene torch-propane is just too slow.

Notice the sand at the bottom. After the center was filled with 2" of lead (for the end cap) sand was placed to seal the outer edge so the outside of the pipe could be poured.

The iridescent rainbow color is from tin contamination. Tin floats on top of the silvery molten lead and looks like bright blue plastic.

After the first 2" the center column gets filled with sand to keep the lead out. Here you can see the area beyond the outer rim filled with white sand to keep the lead from spreading past the (black) outer casing of the pig.
Our Lead Casting Process:
1. Put lead wheel weights into crucible.
2. Heat from above and add more lead.
3. Heat from below while someone else picks out the steel clips with a strainer ladle (big spoon with holes in it).
3. Take away the torch once all the solid junk has been removed.
4. Dip a large wax candle into the molten lead and quickly remove it: it will smoke and then burst into flames.
5. Strain any remaining slag the wax brought to the surface.
6. Pour the lead into the mold.
The wax candle flux helps break the surface tension formed by the intense heat oxidizing impurities in the lead (tin, zinc, etc.). Whatever doesn’t “reduce” back into molten metal gets quickly skimmed off the top with the ladle and then molten lead is poured into the mold. The result is a more homogeneous lead mixture and less lumps or crumbly bits in the finished product.
Alternatively, burnt sawdust or straight-out carbon could be used. The carbon is better at reducing zinc and other various impurities than wax. Goodness knows I sure have enough carbon laying around: http://michaellogusz.blogspot.com/2015/08/great-balls-of-carbon-theyre-actually.html
Supplies Needed:
- At least two buckets of wheel weights, or enough lead by weight (not including wheel clips) to fill your mold.
- Sand to keep lead from filling certain parts of the mold or leaking past the mold.
- Long 3/4" thick wax candle.
- Gloves (thick welder's gloves to hold the torch and for pouring crucible out.).
- Face mask (a full woodworker type plastic mask will help keep the noxious fumes out of your eyes)
- Blocks (concrete, cinder, bricks-it just has to be stable and fire-resistant).
- Bed rails (or something fire-resistant to hold the crucible).
- Ladle with holes (for picking out the steel clips and straining the slag).
- Coffee can for slag (have it near the lead, fill it and empty it occasionally onto the trays).
- Trays or place to dump coffee can of slag out repeatedly.
- Acetylene torch (propane works for casting bullets but not for melting 200lbs of lead).
- Vice grips to help hold crucible when pouring (pliers would slip, remove vice grips after each pour).
- Tiny shovel, broom, dust pan, funnel (to place the sand and then clean up).
Set all this stuff up before starting!!!!! Do a "walk-through" of how to position the torch, how to transition from heating top to bottom without hitting the knobs on the torch, who will ladle the slag and how you'll not burn their hands while they do it.
Casting the Pig! It was finished on Thanksgiving 2016 so it's the Lead Turkey!
Here are the 10-15lbs of clips and slag removed from the first 100lbs of wheel weights' worth of lead. This was once an over-full 5 gallon bucket of wheel weights.
If you buy lead ingots you just get lead. If you buy wheel weights you get 10-35lbs of clips and other junk that gets strained out with the ladle. Remember that when pricing out lead sources!

This is the halfway point. About 100-120lbs of lead have been melted and poured into the mold. Look at those two trays filled with steel clips and slag! That's why you need two people: one just operates the torch--the other strains the clips and slag and then carefully pours the molten lead into the mold.
Blueprints showing the half-way filled status:


The lead turkey on its very own torpedo sled! ( and I know a little something about torpedoes: http://mikelogusz.blogspot.com/ )


Too smokey and too loud!
Gamma Spectrometry 3: Software
PRA / THEREMINO SETTINGS
I keep bouncing between using the PRA software and the Theremino software. With either you have to go into your computer's control panel > sound > recording > mic or line input properties:Under the LEVELS TAB > set volume to 100%
Under the ENHANCEMENTS TAB > CHECK to disable all sound effects
Under the ADVANCED TAB > note your bits (16) and Megahertz (44,000 or 48,000 or 96,000)
In either PRA or Theremino you'll tell it that you're using your soundcard, that it's set to 16 bits and 96,000Mhz or whatever. You'll also have to specify you're using the LEFT channel in and out!
Here are some recommended basic settings for PRA but you'll still have to play with the single input wave audio display with the x/y grid which is super-critical and a total pain:

These settings will change depending on your: scintillator detector; voltage setting on the PMT driver; type of sound card; volume setting of sound card; radioactive source; background radiation; type of experiment you're performing; etc. The above is the recommended starting points.
In some versions of the software, depending on your detector you may have negative pulses. You'll just type in "-0.3" instead of "0.3" in the top left Height Threshold windows.
I played with different Height Threshold settings from 0.01 to 1 and everything still "worked" but the readings were different. So, basically as long as you have the input = Left and output = Left and Channel Selection = LEFT in the PRA or Theremino software and the volume set to 100% on your control panel > soundcard you'll almost always get some sort of reaction by moving radioactive material up to the detector.
After that, it's just calibration to fine tune your settings. For me, getting a response on screen was easy. I'm still playing around with the calibration.
A word of warning: Am-241 has TONS of gamma radiation. Online, many many people write that it's "mostly" or "almost all" alpha radiation, but they are WRONG! While alpha radiation of Am-241 is it's primary decay, a piece of Am-241 out of a smoke detector puts out a LOT of dangerous gamma radiation. Many times people on the internet confuse the (true) statement that "AM-241 decays to NP-237 by 100% alpha emission"...which means just that, the rest of the Am-241 that doesn't turn into Np-237 turns into gamma rays--which is a really weird way of phrasing that, but when everyone else is just cutting and pasting the confusion grows. Thus you have alpha and gamma radiation.
I tend not to cut and paste words from other people-I write what I see and do, and with ALL of my half-dozen different radiation detectors I find a LOT of gamma coming off my numerous Am-241 sources. The internet is an echo chamber, and if someone gets something wrong--well, they're will be a ton of other people repeating that mistake.
When I place a sheet of cardboard between the AM-241 and a detector the count rate goes down, but not away completely. AM-241 can make my gamma detector (which cannot register alpha radiation at all) squeal. Experiment for yourself and see.
Anyway, Am-241 will show up as Am-241, Np-237, Uranium, Protactinium, Thorium, Actinium, Radium, Thallium, a few radioactive versions of lead...it's kind of a mess on a spectroscope. You can get rid of the first four spikes by using a Thorium source like a welding electrode (incorrectly referred to as welding rod) instead of an Am-241 source.
So, to simplify calibration I purchased a CS-137 check source.
Cs-137 beta decays into Ba-137m (metastable). The Ba-137m gamma decays (at 661.64Kev) into stable Ba-137. This gives us the right hand spike on screen. In the center may be a little spike at 551Kev because
Hopefully, once everything is setup properly the screen will show a large spike at 661.64KeV (which is really from the Ba-137m decaying into stable Ba-137) and another Barium spike closer to 32KeV. This is much simpler to deal with at first: two spikes on your computer screen.
As an aside, you can drizzle NaCl onto Cs-137 and elute the radioactive Ba-137m into a liquid solution that is radioactive! This is how those radioisotope generators with the little syringe plungers at school work. Wait an hour and more Cs-137 will decay into Ba-137m, and you can re-wash it with the acid to get even more radioisotopes out.
In these software programs when you do a background calibration there are two different ways: start taking data to teach the program what the individual scintillations look like (with the radioactive sample placed at the detector) or left clicking the computer mouse while using BGO on/off (with NO radioactive sample anywhere near the detector).
One teaches the program what the target isotope radiation (which you are measuring) looks like, the other teaches it what the background cosmic radiation (to be ignored) looks like. If you confuse the two you'll never get your setup calibrated correctly.
An important part in Theremino is "tuning" the waveform in the "Pulse Shape Visualizer" window! Not much is made of it in the manual, but in online tutorial videos it appears to be the key to getting anywhere.
Another thing is time! I would get a spike where I should but everything seemed messy and not really convincing. Then I decided to let it run for a few hours and bingo: much more professional results in PRA. In Theremino I got very similar (and perhaps a tad better) results in minutes--but only after weeks of fiddling with various detectors and finally replacing the old 5M Ohm voltage divider ((below) end caps with a 62M Ohm one from Irad Inc. This gave the added benefit that my new Bicron detector would also would now with my Ludlum 3 survey meter. The Alpha Spectra Inc. worked with the Ludlum 3 already because it has a variable Ohm load up to 16M.

Here is the new 62M Ohm voltage divider. It has a BNC connector. The old one had an MHV (mini high voltage) connector that worked with BNC cables once you trim the protruding white insulation off the MHV connector. Coincidentally, this is why SHV (safe high voltage) connectors were invented: you can't accidentally or on purpose force them to work with lower voltage BNC connectors.


P.S. Here's the internet's only photo (as of 3/7/2018) of a "Keplertron" which is a low-energy beta Spectrometer:

Don't worry-this was suitably declassified before posting ;)
Mike