The internet: to convert a square wave you should use 23 parts, including a couple IC chips and then you'll get a triangular wave that's about 83% of the inputted square wave!
Me: just use a .22uF capacitor and get 100%. One part. Super easy. Buffer it with a couple resistors. Three parts.
Using liquid acid flux (which must be washed off ASAP or else it corrodes whatever you soldered), I joined the laid out brass pieces.
Chassis with axle tubes and front "tongue" soldered together:
This is the finished chassis (shown upside down). It is on the jeweler's board, which is used for mocking up and soldering things. There are holes and movable pins to hold things in place.
I build a 1/24 scale slot car chassis by soldering brass pieces. Here is the purchase list from Slot Car Corner:
I purchased an $8 reproduction, clear plastic Gar-Vic "Sonic Needle" car body from eBay. It came with green window tape masks. I painted the inside of the body with Krylon Foil metallic green and blue paints.
This paint smells very strong, even in an open 2-door garage on a breezy day.
I cut an oval sheet of paper and placed it down the center of the car (with the body laying upside down). Then I sprayed the green paint; removed the paper and sprayed the blue down the center.
It's a lock pick unlocker for the Vanlock company lock.
This is the lock:
7 pin pushers:
I put them on the lathe to reduce the diameter of one end of the pin pushers:
This is a Vanlock key. It has 7 pins that seem to be one of 5 different lengths:
I disassembled the key for curiosities sake, and used the round part as a template:
Drilling the block of the VanLock Rocker:
This pic shows the middle, wider portion of the pusher pins. That keeps it from falling out of either the top or bottom of the block.
If you lock at the last hole it is smaller---it hasn't been drilled yet with a larger bit---but not all the way through. The smaller hole left on the other side of the block will stop the wider middle part of the pusher pins from falling out:
Made a little cap piece to hold the pins in:
JB Weld to epoxy a hollowed out washer. This seats the pick onto the lock.
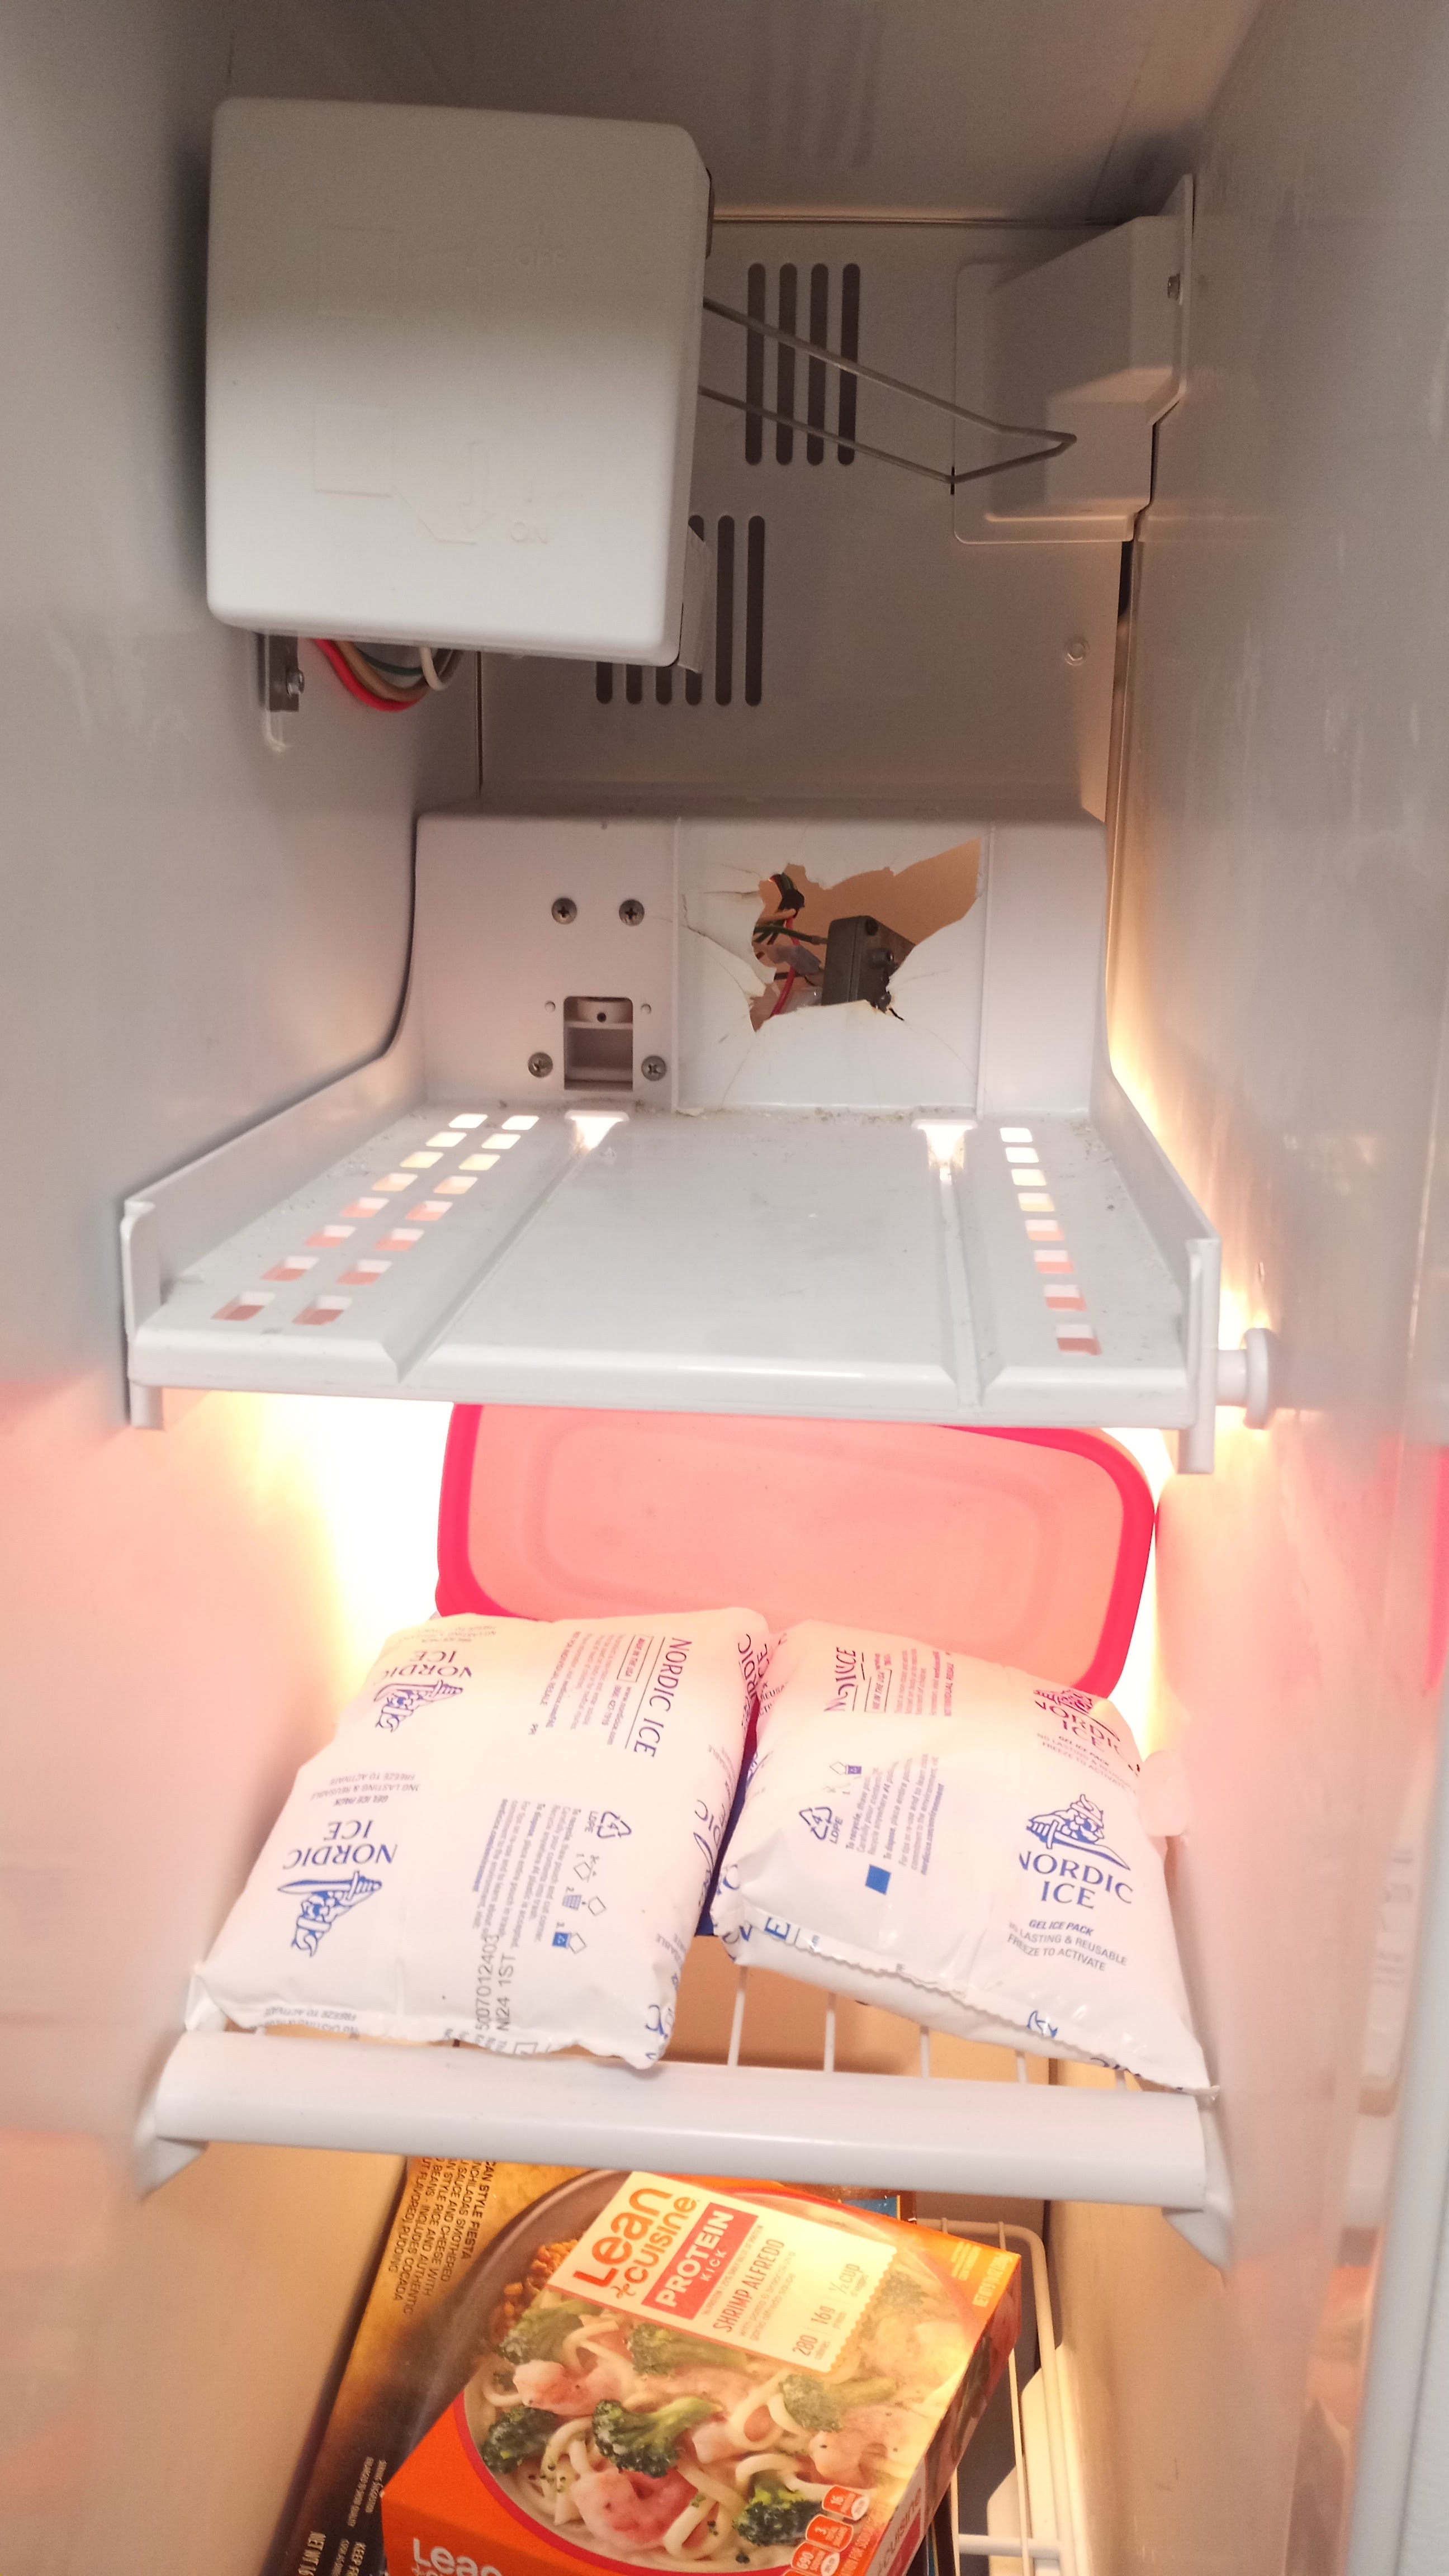
Ice dispenser made a huge noise and stopped shooting ice out the door.
The ice enclosure (Maytag 61005615) had a huge hole where the motor that dispenses and crushes ice fell backwards into the fridge.
One retention screw on left side and it lifted out. Chute door opener rod motor and the big motor are attached via a single plug (green wire on top of plug). I just unplugged stuff individually because I've never worked on a fridge before.
I put the jigsaw pieces back together for the motor mount and traced to a thick sheet of brass and drilled the 4 mounting holes.
I drilled the holes for a loose fit because the brass plate is just acting like a washer so the motor doesn't fall back or forward. It's a patch.
Drilled a 10mm hole where the shaft of the motor attached to the two-finger spinning thing that turns the ice auger. Then band sawed it to the edge. This let me slide the plate on without having to take off the two-finger auger spinner thing.
It works again! Although seeing how brittle everything is I'll probably not use the crushed ice button as often.
Photos are in reverse order... it's more exciting that way.