Showing posts with label Linux. Show all posts

Monday, March 29, 2021

Updating the BIOS on an ancient Acer Aspire One KAV10 AOD150-1322 laptop running Linux Mint 19.3


Updating the BIOS on an ancient Acer Aspire One KAV10 AOD150-1322 laptop running Linux Mint 19.3 to get rid of a problem when it was booting up and shutting down it would go to sleep multiple times during these processes. I had to keep hitting the space bar and sometimes the power button to wake up the laptop so it could continue shutting down or booting up.


The problem would go away if I went into F2 on boot up and turned off the fast start/quick start/ready start quick boot up feature. But then it would loose this change after one or two boots. So I decided to flash the BIOS to the latest version available (a version from way back in 2012!).

The only reason I did this (it took about 3 hours to get past all the wrong advice online) was because the laptop kept going into sleep/hibernate in the middle booting or shutting down. Only attempt to update BIOS on any machine if there is a need. If it goes wrong BIOS problems tend to be unfixable and you can just throw the computer in the trash!

To do this I needed:

-USB stick.

-The Acer Bios files from the ACER website only (comes with Windows and DOS folder--you have to use the DOS folder files).

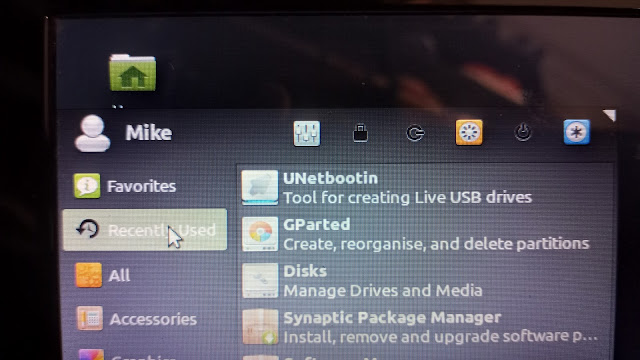
-Unetbootin program loaded.

-GParted program loaded.

-Disks (or Disk Management) program loaded.


Many of the online tutorials are WRONG WRONG WRONG!!!! in their steps. Specifically they tell you: the wrong FAT system, the wrong BIOS file to choose, and a couple other wrong things.


After downloading the BIOS files from Acer and loading the Linux Mint programs on the laptop I was ready to begin.


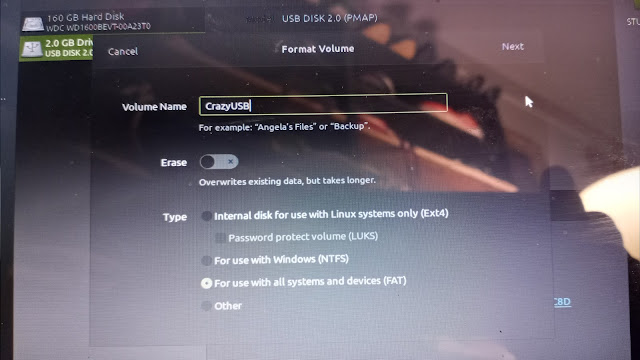
Formatting the USB stick. First off, many tutorials say to use FAT16 but that never worked for me so I used FAT32. When you name your USB make sure to use  8 or less letters in the name. I named mine "CrazyUSB". Keep the name short or else some of these old DOS things will have an issue!


Also when using the programs you MUST make sure you've selected your USB thumb drive and NOT your computer's hard drive. These programs ALL default to your computers hard drive and then you have to select the USB stick (green selection in upper right corner in the photo).

I did this multiple (failed) times and eventually when there was a PARTITION on the USB stick it went better. The USB partition now showed up as "SAFA-CC8D" instead of "CrazyUSB". This is apparently an important change in how the USB stick was formatted. It was still FAT32 but partitioned with Gparted so the above photo may not be the correct way!!! Sorry, but it's all I have.


Look below at this photo. That is what the final, successful USB looked like. But we'll get to that.


After formatting the USB into FAT32 (probably then adding a partition in it) we download the BIOS files from the Acer website. You must go to the Acer website and not some of the other various scam BIOS websites. Acer has it!

The folder might say "Windows" on the outside but when you go inside you want to be working with the DOS files in the DOS folder.


We want the 3 files from the DOS folder (ignore the windows folder).


Start the program Unetbootin and only click the top settings. Select the dot for "Distribution" and select "FreeDOS" and "1.0" and click OK. This downloads and formats FreeDOS to your USB stick.


Here's where things get confusing. Some people say you can just drag and drop your 3 BIOS files (Flashit.EXE, KAV10.BAT and KAV10.FD) but what I did was do start Unetbootin again.

Click to dot the "Diskimage" and select "ISO" and then browse to find the DOS file called FLASHIT.EXE and click ok.

Then I grabbed the other two files (KAV10.BAT and KAV10.FD) and just dragged and dropped them into the USB folder.

To be clear: we are using UNetbootin to LOAD the Flashit.EXE file and closing UNetbootin. Then we are just dragging and dropping the other two files with our mouse.


Finally getting to the actual BIOS update. After getting the computer to boot from the USB properly you'll see a countdown. I had it hang up and keep counting down from 10 seconds and then starting over and over again. It's a blue and grey screen that says "default" on it. Eventually after repeatedly trying slight variations on the above steps I got it to actually bring me to a boot screen where I had choices:

1 was the default (someone said never use that for some reason) so I chose either 2 or 5. I think it was the "5" boot as live disc, etc. 

I finally got to a Insyde bios screen with an "A prompt". You have to change the A prompt to a "C" prompt, and then choose the BAT file (NOT the EXE file) to run.

I was at the A:\> and 

Type C:
Hit enter
You should now have a C:\> prompt
Type KAV10.BAT

Then came this glorious screen:


You can sit and watch the FFFFxxxx blocks updating. It only takes a minute or two. Then your computer will reboot itself.


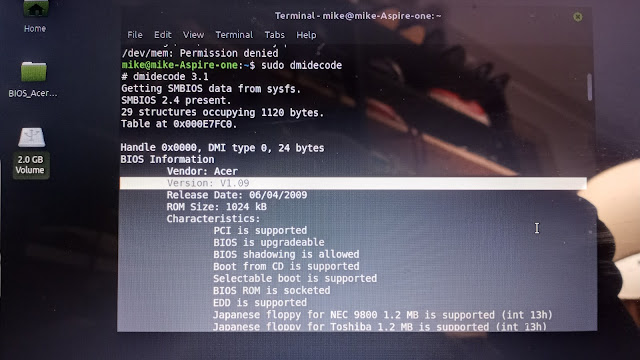
Go into Terminal and type "sudo dmidecode" to view your important stats, including the BIOS which you'll have to scroll up to the top of the list to see.


Success: now it's V1.09 which is the last update to this BIOS as of the year 2021. It will probably be the last BIOS update for the old Acer laptops from the 2000s.


So here are the errors in many online tutorials that I had to get past:

-Fat 32 (not Fat 16).
-Partition Fat 32?
-Use the DOS BIOS folder items (not the Windows BIOS folder items).
-UNetbootin loads DOS 1.0 itself (you don't have to download other DOS things).
-Load the EXE file (don't just click and drag it), but then click and drag the other two files!
-Once at the C prompt type in the name of the BAT file (not the EXE file).

It is pretty impossible to take screenshots while doing DOS/BIOS/Linux stuff like this so it's just cellphone photos that I wasn't intending on using online--just notes in case everything went wrong--which it did for 3 hours. I just pieced back about 98% of I what finally worked. Still hazy on how the USB was formatted to FAT32 (and then partitioned I'm pretty sure also in FAT32 using GParted?).

The only reason I did this (it took about 3 hours to get past all the wrong advice online) was because the laptop kept going into sleep/hibernate in the middle booting or shutting down. Only attempt to update BIOS on any machine if there is a need. If it goes wrong BIOS problems tend to be unfixable and you can just throw the computer in the trash!

Sunday, June 19, 2016

How to Fix Linux Printing Problem


How to Fix Linux Printing Problem


When printing in Linux do you get a zillion blank pages or tons of pages with lines of weird nonsense across the top? Does this happen especially with Word documents that have images inserted in them and PDF files?


The fix is totally easy:


1. Go to Menu > All Programs > Printers.

2. Right click on your Printer and select Properties.

3. In Printer Properties select Printer Options.

4. Change "Print Quality" to something other than what is already selected.

5. Click Apply.

6. Click OK.


That's it! You don't even have to reboot to printer or computer.

My printer was set to "Normal Greyscale" so I changed it to "Normal" and all of a sudden everything worked fine.

Most printers have a bunch of settings to choose from.

For what it's worth I have an 8 year old Dell Inspiron with an ancient black and white Dell 1700 printer that makes the lights in the room dim every thirty seconds whenever it's turned on.

My printer driver is just the "Generic PCL 6/PCL XL Printer Foomatic" generic driver.

I needed to get a bunch of stuff printed for a job interview: nothing but hieroglyphics were coming out of the printer. A text-filled Word document printed fine, but when I pasted in a photo of my degree and transcripts I got 20 pages of garbage printed out. The same when I tried to print a PDF of my last pay stub. I got sick of jumping from computer to computer and rebooting into Windows Vista (one of my desktops if dual boot).

Some people have to try a few different print quality settings before they find one that works. I lucked out on my first try.

Hope this helps, pass it along!


Tuesday, February 2, 2016

GET YOUR KEYBOARD TO LIGHT UP IN LINUX MINT


HOW TO GET YOUR KEYBOARD TO LIGHT UP IN LINUX MINT


Okay, so Linux Mint uses the “Scroll Lock Key” for a lot of stuff. However, most keyboards that can light up for easier typing in the dark use the Scroll Lock Key to also turn the LED illumination on and off. Sometimes it will say “EL on/off” under the words “Scroll Lk”.


Obviously that sucks. Especially if you have an awesome keyboard like my Logisys one that glows blue. So you have to do some typing in the Terminal window in Linux to get your scroll lock key back. Although Linux has thrown me some curveballs in the past two days (Cinnamon constantly crashing until I downloaded MATE desktop and setting it as my default workspace, etc.) At least I don't have to see things like this  every few days:


Okay, Terminal is that black square button with “>-“ on it. It opens up a black screen that is a lot like the old DOS programming window.


Whenever I write “Type:” you type whatever is written after that and then click your Enter key.

1. Click on the Terminal button to open Terminal

Here’s where it gets weird. I somehow didn’t have permissions for any of my home files. Yep, I did NOT own my own files somehow. You may or may not have this problem. This second step gives you permission to read and write to your own files. I didn’t realize this because I’ve only had Linux Mint on my computer for 2 days (yet, figuring this out I feel is quite impressive). If you do already have permissions throughout your home directory you can skip to step 5.

2. Type:   Sudo

3. Enter your password

4. Type:  Sudo chown –R mike : mike /home/mike

Make sure to change ‘mike’ to your user name and pay attention to where there are spaces!

This will run a bunch of files, giving you permission to read and write to them. It’ll only take a minute to go through. So, back to fixing the keyboard.

5. Type:  xmodmap –pm

This will list a few things with numbered mod lines. Usually 3 has nothing next to it, it’s just a blank space next to the 3. So, we’ll use 3 as our Scroll Lock light button place. If you have a different number blank then use that number. Somewhere I think I read you can go up to 32 or 35. I dunno. Just make sure 3 is blank and then go to the next step.

6. Type: cd ~

That’s cd followed by a space and then the ~ tilde symbol that’s at the upper left corner of your keyboard.

7. Type:      Echo >.Xmodmap “add mod3 = Scroll_Lock”

Yes, there is a space after echo, but not after the >, and yes it’s a capital X and there is an underscore between Scroll and Lock.
You may notice your keyboard is lit up now!

8. Type: exit

This will exit you from Sudo (an elevated super user admin thing)

9. Type: exit

Yes, you exit again to exit from the Terminal program itself.


Now, restart your computer and see if your keyboard illumination light turns on right after booting up.

On my keyboard, this doesn’t actually make the Scroll Lock button work as the on/off—but it does light up my keyboard and keeps it lighted.

Alternately you can go into terminal and type:   xset led 3     which will turn your keyboard light on. You can shut off your keyboard light by typing:   xset –led 3

The xset codes get erased on rebooting. But it’s a nice option.

Another option (which just wouldn't take at the root level for me at least) was Xmodmap -e 'add mod3 = Scroll_Lock' which possibly will let you toggle your keyboard lights off and on. You'd have to add it (using "echo") to the ROOT folder of Xmodmap (I think) so the code would look a bit different in front of the .Xmodmap part. At one point it worked for me, but then stopped working. I don't mind my keyboard lights on all the time, so I just went with the simpler version without the "-e" portion, as I described in the numbered steps above.

For my next trick I’ll cut the wires from the LED backlights and solder them to a toggle switch and a point somewhere on the keyboard’s circuit board with the proper voltage. Maybe at the USB cable? That would be too high voltage? I dunno. I’ll dig around in there at some point.  I don’t mind the LED light on all the time, so I’m not too amped up about it.


That was so boring. Computer "Science" is boring. Meow!


ANOTHER GREAT LINUX MINT TIP


Minimizing / hiding Chromium or even Word files with the upper right ‘_’ minimize button makes them disappear forever. Clicking on the show desktop button only brings them back if you hide them that way…sometimes.

Click on ALT + TAB key and you’ll get a choice of all the hidden / minimized internet browsers and other things you’ve hidden and lost or forgot about. Nice!

By the way, for all of the above I’m using the MATE desktop of Linux Mint 17.3 Cinnamon!


Big deal. I can hide / unhide myself anytime I want to in this mini Coleman camping tent! Meow! ...Actually I'm not too great at zipping and unzipping it up by myself.